Tag: Productivity Tips

  • The Best AI Chrome Extensions of 2025 You Didn’t Know About

    The Best AI Chrome Extensions of 2025 You Didn’t Know About

    We all know the famous ones—the grammar checkers, the chatbot sidebars, the common AI assistants that everyone recommends. But the real power users know that the most transformative tools are often the ones flying under the radar. The ecosystem of AI Chrome extensions is evolving at a breakneck pace, and 2025 is set to be defined by hyper-specialized, context-aware intelligence that works seamlessly within your browser.

    This isn’t just about correcting your grammar or summarizing an article. We’re talking about extensions that can deconstruct complex data, automate multi-step workflows, and enhance your creativity in ways you haven’t imagined. Ready to upgrade your digital toolkit? Let’s dive into the best AI Chrome extensions of 2025 that you probably haven’t discovered yet.

    Read more about AI Productivity Tools: The Unseen Engine of Modern Work

    Beyond Grammar: The Next Generation of Writing and Communication Aides

    While basic AI writers are everywhere, the next wave of AI Chrome extensions focuses on nuance, tone, and platform-specific optimization.

    ToneShift: Adaptive Communication AI

    Ever written an email that came across as too harsh? Or a social media post that fell flat? ToneShift is the solution. This ingenious extension analyzes your draft text and suggests real-time alterations to match a desired tone—from “Professional and Confident” to “Friendly and Casual” or even “Persuasive and Urgent.” It goes beyond synonyms, restructuring sentences to ensure your message lands exactly as intended, across every platform from LinkedIn and Gmail to Slack.

    Contextual Reply: The Inbox Autopilot You Control

    Most email AIs are generic. Contextual Reply is different. It reads the entire email thread, understands the context and nuances, and generates not one, but three distinct reply options for you to choose from: a quick acknowledgment, a detailed response, or a proactive question to keep the conversation moving. It’s like having a personal communications assistant that truly understands the flow of your work.

    Research and Analysis: From Overwhelmed to Over-Informed in Seconds

    AI Chrome extensions

    The modern web is a firehose of information. These AI Chrome extensions act as intelligent valves, helping you process, analyze, and synthesize data effortlessly.

    DataSnag: Your Instant Data Visualizer

    Found a table of complex data on a webpage? Instead of painstakingly copying it into a spreadsheet, simply click the DataSnag icon. This powerful extension doesn’t just extract the data; it uses AI to instantly generate charts, identify key trends, and provide a one-paragraph summary of the insights. It’s a game-changer for analysts, students, and anyone who needs to make sense of numbers quickly.

    Veracity Check: Your Built-in Fact-Checker

    In an era of misinformation, Veracity Check is an essential utility. As you browse news articles or long-form content, this extension automatically highlights claims and statistics. A single click reveals a sidebar with credible, sourced information that corroborates or challenges the claim, pulling from established fact-checking databases and academic sources. It brings critical context to everything you read.

    Productivity and Workflow: Automating the Unseen Tasks

    The true mark of a powerful tool is its ability to automate the tasks you didn’t even realize were slowing you down. These AI Chrome extensions are the silent workhorses of productivity.

    FlowWeave: The Multi-App Automator

    FlowWeave is a visual workflow automation tool that lives in your browser. It lets you connect different web apps with simple “if-this-then-that” logic, but with an AI brain. For example, you can create a flow that: “When I ‘star’ an email in Gmail with the label ‘To-Tweet,’ the AI automatically drafts a Twitter-friendly version of the email content and saves it to a Google Doc.” It eliminates the friction between your most-used tools.

    TabSage: The Intelligent Tab Manager

    We’ve all suffered from tab overload. While other tab managers just organize, TabSage uses AI to understand why you have tabs open. It can automatically group tabs by project (e.g., “Q4 Marketing Report,” “Vacation Planning”), suggest which tabs can be safely suspended or closed based on your usage patterns, and even create a “session summary” of your key activities from a cluttered browsing window.

    Creativity and Content Creation: Unleashing Your Inner Innovator

    For designers, developers, and content creators, a new class of AI Chrome extensions is turning the browser into a creative canvas.

    PalettePerfect: The AI Color Theorist

    This extension is a designer’s dream. See a website with a color scheme you love? Activate PalettePerfect, and it doesn’t just extract the colors. It uses AI to understand the color theory behind the palette, generate complementary and analogous schemes, and provide the exact CSS codes to use it in your own projects. It’s like having a professional color consultant available on every site you visit.

    CodeExplain: The Developer’s Rubber Duck, Supercharged

    For developers, understanding a piece of unfamiliar code on GitHub or a documentation site can be time-consuming. CodeExplain allows you to highlight any code snippet, and it will break it down in plain English, explain its function, identify potential errors, and even suggest optimizations. It dramatically accelerates learning and debugging.

    How to Integrate These AI Chrome Extensions Into Your Life

    AI Chrome extensions

    Adopting too many new tools at once can be counterproductive. Here’s a smart approach:

    1. Audit Your Friction: Identify one or two repetitive tasks that drain your time each week. Is it research? Writing emails? Managing tabs?
    2. Pick One and Pilot: Choose the single AI Chrome extension that best addresses your biggest pain point. Use it exclusively for a week.
    3. Evaluate and Iterate: Did it genuinely save you time or improve your output? If yes, keep it and consider adding another. If not, uninstall and try a different one.

    The goal is strategic enhancement, not digital clutter.

    The Future is Contextual and Invisible

    The trajectory for the best AI Chrome extensions in 2025 is clear: they are becoming more contextual, integrated, and invisible. They will understand not just what you’re doing, but why you’re doing it, offering proactive assistance that feels less like using a tool and more like having a superpower. Don’t just browse the web—command it. Start by installing one of these incredible tools today and experience the future of productivity firsthand.

  • How to Create a Custom Keyboard Shortcut for Any App You Didn’t Know About

    How to Create a Custom Keyboard Shortcut for Any App You Didn’t Know About

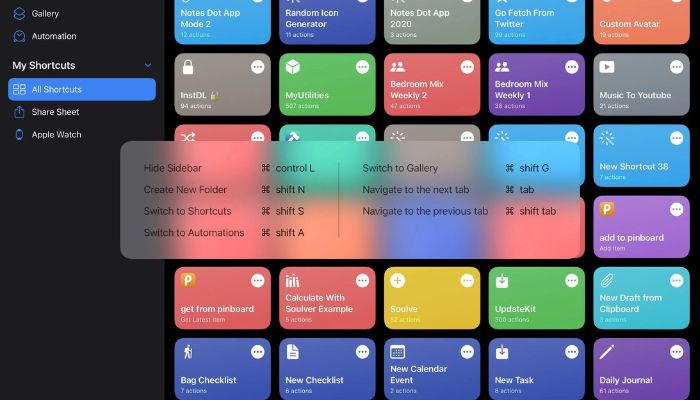
    How many times have you reached for your mouse, tracked across the screen, navigated a menu, and clicked a command, all for an action you perform dozens of times a day? These micro-interruptions add up, silently eroding your productivity and breaking your creative flow. What if you could execute those same commands with a simple, instantaneous key press? The power to do this has been hiding in plain sight within your operating system. Learning how to create a custom keyboard shortcut is one of the most impactful yet underutilized productivity upgrades available to any computer user.

    This definitive guide will demystify the process, showing you that you don’t need to be a tech wizard to create a custom keyboard shortcut for virtually any application, script, or system action. We will move beyond the basic Ctrl+C and Ctrl+V and unlock a level of efficiency that makes your computer work for you, not the other way around. Get ready to streamline your workflow in ways you never thought possible.

    Read more about How to Batch Rename Files in Windows Without Extra Software

    Why Bother? The Unbeatable Benefits of a Custom Keyboard Shortcut

    Before we dive into the “how,” let’s solidify the “why.” A well-planned custom keyboard shortcut does more than just save a second or two. It fundamentally changes your interaction with your machine.

    • Dramatically Enhanced Productivity: Eliminating the need to navigate menus with a mouse can save hours per week, especially for repetitive tasks in design, coding, or data entry software.
    • Reduced Physical Strain: Constantly switching between keyboard and mouse can contribute to repetitive strain injury (RSI). Keeping your hands on the home row as much as possible is a healthier computing habit.
    • Uninterrupted Workflow: Maintaining your train of thought is crucial for deep work. A custom keyboard shortcut allows you to execute commands without breaking your concentration.
    • Personalized Computing Experience: You can tailor your computer to fit your unique workflow, creating shortcuts for actions the original developers never considered.

    Method 1: Creating a Global Custom Keyboard Shortcut in Windows

    Windows provides a native, if slightly hidden, method to create a custom keyboard shortcut that can launch any application, file, or folder from anywhere in the operating system.

    Step-by-Step Guide to Windows Shortcut Creation

    This process involves creating a special shortcut file and assigning a key combination to it.

    1. Locate or Create a Shortcut: Find the application’s executable (.exe) file or the file/folder you want to open. Right-click it and select “Create shortcut.” This will create a shortcut file on your desktop. (You can move this file later).
    2. Access the Shortcut’s Properties: Right-click on the new shortcut file and select “Properties.”
    3. The Magic Field: Shortcut Key: In the Properties window, navigate to the “Shortcut” tab. You will see a field labeled “Shortcut key.” Click inside this field.
    4. Assign Your Key Combination: Now, press the key combination you want to use. Windows will automatically prepend Ctrl + Alt to your chosen key. For example, if you press W, the field will display Ctrl + Alt + W. This is the standard format for these global shortcuts. You cannot use a single key like W on its own, which prevents accidental activation.
    5. Apply and Test: Click “Apply” and then “OK.” Now, minimize all your windows and press your new key combination (Ctrl + Alt + W in our example). Your target application or file should launch immediately.

    Pro Tip: Use this method to create a “quick-launch” panel for your most-used programs. Assign Ctrl + Alt + 1 for your browser, Ctrl + Alt + 2 for your text editor, and so on.

    Method 2: Creating Application-Specific Custom Shortcuts

    Custom Keyboard Shortcut

    Many powerful applications allow you to create a custom keyboard shortcut directly within their settings. This is where you can truly optimize your workflow for specific tasks.

    How to Set Up In-App Keyboard Shortcuts

    The location of these settings varies, but the principle is universal.

    1. Open the Application’s Preferences or Settings: Look for a menu item like “Preferences,” “Settings,” or “Options.”
    2. Find the Keyboard Shortcuts Section: This is often labeled “Keyboard,” “Shortcuts,” “Key Bindings,” or found under an “Advanced” tab.
    3. Locate the Command and Assign a Key: You will typically see a searchable list of all available commands. Find the one you want (e.g., “Paste without Formatting,” “Create New Layer,” “Split Window”) and click in the field next to it. Then, simply press your desired key combination.
      • In Adobe Photoshop: Go to Edit > Keyboard Shortcuts.
      • In Microsoft Word: Go to File > Options > Customize Ribbon > Keyboard Shortcuts (Customize…).
      • In Visual Studio Code: Go to File > Preferences > Keyboard Shortcuts.

    This method is perfect for creating shortcuts for features you use frequently that don’t have a default one, or for overriding defaults with a scheme you find more intuitive.

    Method 3: The Power User’s Guide to Custom Keyboard Shortcuts on macOS

    Mac users have an incredibly powerful and versatile tool built right into the system called Automator, which can be used to create a custom keyboard shortcut for complex workflows.

    Using System Preferences for Basic Shortcuts

    1. Open System Preferences and go to “Keyboard” > “Shortcuts.”
    2. Select “App Shortcuts” from the left-hand sidebar.
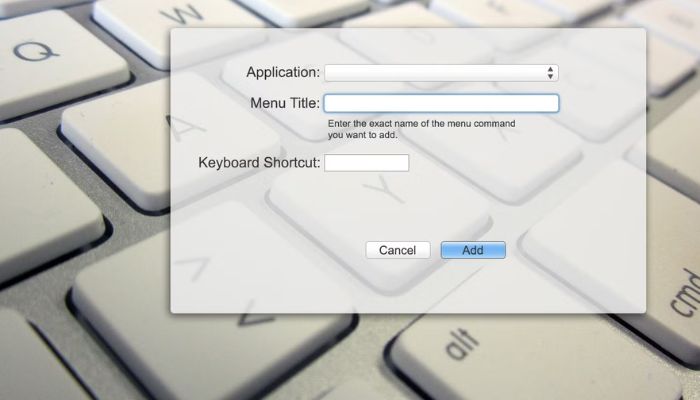
    3. Click the “+” button to add a new shortcut.
    4. Choose the Application (or “All Applications” for a global shortcut).
    5. Enter the Exact Menu Title of the command you want to trigger, including the ellipsis (…) if it’s there.
    6. Assign the Keyboard Shortcut in the field. It’s best to use Cmd + Shift or Cmd + Ctrl plus another key to avoid conflicts.

    Using Automator for Advanced Workflows

    Custom Keyboard Shortcut

    For multi-step actions, Automator is your best friend.

    1. Open Automator and create a new “Quick Action.”
    2. In the workflow, set “Workflow receives current” to “no input.”
    3. Drag and drop actions from the library to build your sequence (e.g., “Get Specified Finder Items,” “Open Finder Items” with a specific app).
    4. Save the Quick Action with a descriptive name.
    5. Now, go to System Preferences > Keyboard > Shortcuts > Services.
    6. Find your new Quick Action in the list and assign a custom keyboard shortcut to it.

    This allows you to, for example, press a key combo to take a selected image, resize it, and open it in Photoshop—all automatically.

    Best Practices for Your Keyboard Shortcut Setup

    A disorganized shortcut scheme can be worse than no scheme at all. Follow these tips to stay efficient.

    • Be Consistent: Try to use similar key combinations for similar actions across different apps (e.g., always use Ctrl+Shift+S for “Save As”).
    • Avoid Conflicts: Before assigning a new shortcut, test it to ensure it doesn’t override a critical existing shortcut in your most-used applications.
    • Start Small: Don’t try to memorize 20 new shortcuts at once. Introduce them one or two at a time into your workflow until they become muscle memory.
    • Document Your Scheme: Keep a simple text file or note with your most important custom shortcuts. This is invaluable when you’re still learning or if you need to set up a new machine.

    Troubleshooting Common Shortcut Problems

    • Shortcut Doesn’t Work: The most common cause is a conflict with another application. Try a different key combination.
    • The “Shortcut Key” Field is Grayed Out: This usually means you are trying to set a shortcut for the original .exe file, not a shortcut file. Ensure you are in the properties of a .lnk shortcut file.
    • Mac Shortcut Inconsistent: Double-check that you typed the menu command exactly as it appears, including capitalization and punctuation.

    Conclusion: Take Control and Master Your Digital Workspace

    The ability to create a custom keyboard shortcut is a superpower that transforms your computer from a one-size-fits-all tool into a finely tuned instrument of your will. It represents the shift from passive user to active operator. The initial investment of time to set up these shortcuts pays exponential dividends in saved time, reduced frustration, and a smoother, more professional workflow.

    Custom Keyboard Shortcut

    Start today. Pick one repetitive task that annoys you, follow the steps in this guide to create a custom keyboard shortcut for it, and experience the immediate satisfaction of a more efficient digital life. Your future self, with their effortlessly organized and streamlined workflow, will thank you.

  • How to Batch Rename Files in Windows Without Extra Software

    How to Batch Rename Files in Windows Without Extra Software

    Are you tired of manually renaming dozens, or even hundreds, of files one by one? Perhaps you have a folder of vacation photos with confusing names like IMG_001.jpgIMG_002.jpg, or a collection of documents that desperately need a consistent naming convention. Manually correcting this is a tedious and time-consuming task. Fortunately, you don’t need to download any third-party utilities to solve this problem. Windows has powerful built-in tools that let you batch rename files quickly and efficiently.

    This comprehensive guide will walk you through three native Windows methods to batch rename files in bulk. Whether you’re a casual user who prefers a point-and-click interface or a power user comfortable with command lines, we have a solution for you. By the end of this article, you’ll be able to organize your digital files with confidence, all without installing a single piece of extra software.

    Why You Should Master Batch Renaming in Windows

    Knowing how to batch rename files is more than just a neat trick; it’s a core digital organization skill. A well-named set of files is easier to search, sort, and manage. Consistent file names improve professionalism when sharing projects with colleagues or clients and are essential for managing large libraries of photos, music, or documents. The ability to batch rename files directly in Windows saves you from the hassle and potential security risks of downloading unknown software from the internet. The native tools are powerful, safe, and ready to use.

    Method 1: The Easiest Way – Using Windows File Explorer

    For most users, the Windows File Explorer method is the quickest and most straightforward way to batch rename files. It’s a graphical, intuitive process that requires no technical knowledge.

    Step-by-Step Guide to Batch Renaming in File Explorer

    1. Open and Select: Navigate to the folder containing the files you want to rename. Select all the files you wish to include. You can click and drag your mouse, or use the keyboard shortcut Ctrl + A to select all files in the folder. To select specific files, hold down the Ctrl key and click on each one.
    2. Initiate the Batch Rename: With the files selected, you can either:
      • Right-click on the first selected file and choose “Rename.”
      • Simply press the F2 key on your keyboard.
      • Click the “Rename” button in the Home tab of the File Explorer ribbon.
    3. Enter the New Name: Type the new base name for your files. For example, you might type Summer_Vacation_2024.
    4. Execute and Review: Press the Enter key. Windows will automatically rename all selected files, appending a sequential number in parentheses to the end of each file. Your files will now be named:
      • Summer_Vacation_2024 (1).jpg
      • Summer_Vacation_2024 (2).jpg
      • Summer_Vacation_2024 (3).jpg

    This method is perfect for quickly organizing a set of files with a common, descriptive name. The entire process to batch rename files this way takes only seconds.

    Method 2: The Powerful Way – Using Windows PowerShell

    For those who need more control and advanced options, Windows PowerShell is the ultimate tool to batch rename files. It allows you to use complex rules, change file extensions, and even remove specific characters based on patterns.

    Basic Bulk Rename with PowerShell

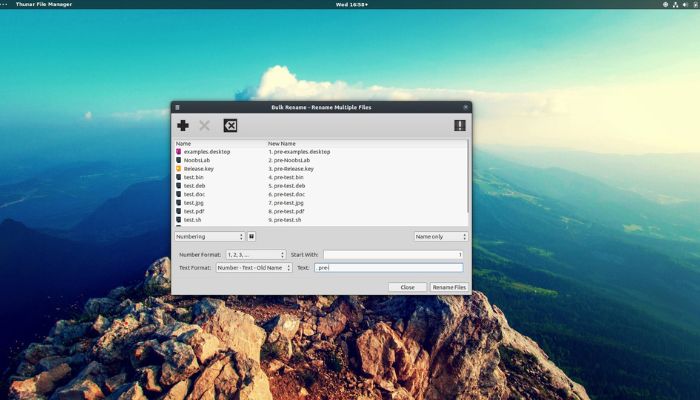
    Batch Rename Files

    Let’s start with a simple example that mirrors the File Explorer method but with more precision.

    1. Open PowerShell in the Target Folder: Navigate to your folder in File Explorer. Click on the address bar, type powershell, and press Enter. This opens a PowerShell window with the path already set to your current folder.
    2. Run a Simple Rename Command: Let’s say you want to add a prefix to all .txt files. The command would be:powershellGet-ChildItem *.txt | Rename-Item -NewName {“Project_Log_” + $_.Name}This command finds all files with the .txt extension and renames them, adding “Project_Log_” to the beginning of each original filename.

    Advanced PowerShell Techniques for Batch Renaming

    The real power of PowerShell lies in its ability to use conditional logic and regular expressions (regex). Here are some practical examples.

    Example 1: Replacing Spaces with Underscores

    To clean up filenames by replacing all spaces with underscores, you can use the -replace operator.

    powershell

    Get-ChildItem *.* | Rename-Item -NewName { $_.Name -replace " ", "_" }

    Example 2: Removing a Specific Phrase

    If you have files with an unwanted phrase, like “DRAFT,” you can remove it entirely.

    powershell

    Get-ChildItem *.* | Rename-Item -NewName { $_.Name -replace "DRAFT", "" }

    Example 3: Sequential Numbering with Leading Zeros

    For professional sequencing (e.g., for photos or chapters), you can add sequential numbers with a fixed number of digits.

    powershell

    Get-ChildItem *.jpg | Sort-Object Name | ForEach-Object -Begin { $count=1 } -Process { Rename-Item $_.FullName -NewName ("Conference_Photo_{0:D3}.jpg" -f $count++) }

    This command will rename .jpg files to Conference_Photo_001.jpgConference_Photo_002.jpg, etc.

    Pro Tip: Always use the -WhatIf parameter with the Rename-Item command before executing. This will show you a preview of the changes without actually renaming anything, preventing potential mistakes.
    Example: Get-ChildItem *.txt | Rename-Item -NewName {"New_" + $_.Name} -WhatIf

    Method 3: The Classic Way – Using Command Prompt (CMD)

    While PowerShell is more modern and powerful, the classic Command Prompt still has a reliable command to batch rename files: the ren (or rename) command. It’s useful for simple, wildcard-based renaming tasks.

    How to Use the ren Command for Batch Renaming

    Batch Rename Files
    1. Open Command Prompt in the Folder: Like with PowerShell, navigate to your folder in File Explorer, click on the address bar, type cmd, and press Enter.
    2. Understand the ren Syntax: The basic syntax is ren "original_pattern" "new_pattern". Wildcards (*) are used to match multiple files.
    3. Execute Common Rename Tasks:
      • To change a file extension for all files in a folder:cmdren *.txt *.docThis changes the extension of every .txt file to .doc.
      • To add a prefix to all .png files:cmdren *.png “backup_*.png”This renames image.png to backup_image.png.
      • To replace part of a filename: Let’s replace “old” with “new” in all files that contain that word.cmdren *old* *new*This would rename my_old_file.txt to my_new_file.txt.

    The Command Prompt is less intuitive than the other methods, but it’s incredibly fast for these specific, pattern-driven tasks.

    Read more about Never Lose Data Again: Your Guide to Automated Backups Windows

    Pro Tips and Best Practices for Batch Renaming

    Before you start your bulk renaming spree, keep these best practices in mind to avoid common pitfalls.

    • Always Create a Backup: Before using PowerShell or Command Prompt on a large set of important files, copy the files to a temporary folder. This gives you a safety net in case the rename operation doesn’t go as planned.
    • Preview Your Changes: As mentioned, use the -WhatIf parameter in PowerShell to see what will happen before you commit.
    • Mind the File Extensions: Be very careful not to alter the file extension (the part after the last dot, like .jpg.docx). Changing this can make the file unopenable by its default program. In File Explorer, ensure “File name extensions” is checked under the View tab so you can see them.
    • Use Descriptive Names: A good file name tells you what the file contains. Use dates (in a YYYY-MM-DD format for easy sorting), project names, and version numbers where appropriate.

    Troubleshooting Common Batch Rename Issues

    • “A duplicate file name exists” Error: This happens if your rename operation would result in two files having the same name. The sequential numbering in File Explorer prevents this, but in PowerShell/CMD, you need to ensure your new naming pattern is unique for each file.
    • “The system cannot find the file specified” Error in CMD/PowerShell: This usually means there’s a typo in your file path or the wildcard pattern isn’t matching any files. Double-check your command and the contents of the directory.

    Conclusion: Master Your File System with Native Tools

    As we’ve demonstrated, you possess all the tools you need to batch rename files effectively, built directly into your Windows operating system. From the simplicity of File Explorer to the raw power of PowerShell, you can choose the method that best fits your comfort level and the task’s complexity.

    Embrace these techniques to transform your disorganized folders into models of clarity and efficiency. Stop wasting time on manual renaming and start leveraging the powerful, native capabilities of Windows to keep your digital world perfectly organized.