Tag: PowerShell Scripts

  • How to Use Task Scheduler for Routine Maintenance

    How to Use Task Scheduler for Routine Maintenance

    We all know our computers need regular check-ups. But between work, life, and everything else, tasks like disk cleanup and file organization often fall by the wayside. What if your computer could handle its own routine maintenance automatically, while you sleep?

    The tool you need is already built into your Windows machine. It’s called Task Scheduler, and it’s a powerhouse for automation that most users never fully explore. Learning how to use Task Scheduler for routine maintenance can transform your PC from a device you constantly manage to a self-sustaining workstation.

    Let’s dive into how you can harness this built-in tool to automate essential tasks you probably didn’t know you could schedule.

    Read more about How to Create a Custom Keyboard Shortcut for Any App You Didn’t Know About


    Why Automate Your PC’s Upkeep?

    Before we get into the “how,” let’s cover the “why.” Manual routine maintenance is easy to forget. Automating it with Task Scheduler offers undeniable benefits:

    • Set-and-Forget Efficiency: Create a task once, and it runs indefinitely. You free up mental energy and ensure critical jobs are never overlooked.
    • Consistent Performance: Regular cleanup prevents the digital clutter that slows down your system over time.
    • Proactive Problem Solving: Schedule tasks to run during off-hours, so they don’t interrupt your workflow. You can even set up alerts for potential issues.
    • Beyond Basic Cleanup: While cleanup is key, you can automate everything from launching scripts to backing up specific folders, making your digital life remarkably streamlined.

    Getting Started: Your First Glimpse of Task Scheduler

    To open Task Scheduler, press the Windows Key + R, type taskschd.msc, and hit Enter. You’ll see a window divided into three main sections: the left-hand navigation pane (the library), the center action pane, and the right-hand actions panel.

    Microsoft already uses this tool for its own system maintenance, which you can see in the Task Scheduler Library > Microsoft > Windows folder. Don’t be intimidated; creating your own task is straightforward.


    How to Use Task Scheduler for Routine Maintenance: A Step-by-Step Guide

    routine maintenance

    Let’s create a practical automated task from scratch. We’ll set up a monthly disk cleanup, a perfect example of essential PC upkeep.

    Step 1: Create a Basic Task
    In the right-hand Actions panel, click “Create Basic Task.” This wizard is perfect for beginners. Give it a clear name and description, like “Monthly Disk Cleanup – Automated.”

    Step 2: Set the Trigger
    The trigger is the “when.” For our routine maintenance, select “Monthly.” You can choose a specific day, like the first Sunday of every month, when you’re unlikely to be using the computer.

    Step 3: Define the Action
    This is the “what.” Select “Start a program.” Now, for the program/script, we won’t be clicking through menus. Instead, we’ll use a powerful command. In the “Program/script” field, type: cleanmgr.exe

    Step 4: Add an Argument (The Secret Sauce)
    To make cleanmgr run automatically, we need to pass it an argument. Click in the “Add arguments” field and type:
    /sagerun:1
    This tells Disk Cleanup to run with a predefined set of options, which we will set up next.

    Step 5: Configure Disk Cleanup Settings
    Before this task will work, we need to define what sagerun:1 means.

    1. Press Windows Key + R, type cleanmgr.exe /sageset:1, and hit Enter.
    2. A Disk Cleanup window will appear. Check all the file types you want to be automatically deleted (e.g., Temporary Internet Files, Recycle Bin, Temporary files).
    3. Click OK. You won’t see anything happen, but your selections are now saved.

    Your automated routine maintenance task is now ready! It will run silently every month, keeping your hard drive free of clutter.


    Advanced Automated Maintenance You Can Implement

    Once you’re comfortable, you can schedule a wide array of automated PC tasks. Here are a few powerful ideas:

    H2: Automate Advanced Routine Maintenance with Scripts

    For more control, you can point Task Scheduler to run batch files or PowerShell scripts.

    H3: Schedule Defragmentation as Part of Your Routine Maintenance
    While Windows does this automatically, you can create a custom schedule. Create a new task and set the program/script to defrag.exe. In the arguments field, use C: /O to optimize your C: drive.

    Automate Specific Backups: Use a tool like Robocopy (a robust file-copying command) in a batch file. You can create a task that runs every Friday night to back up your Documents folder to an external drive, ensuring you never lose important work.

    Clear Temp Folders Weekly: Create a task that runs a command to delete temporary files. The program would be cmd.exe and the arguments would be /c del /q /f /s %TEMP%\*.*. This is a more aggressive cleanup that complements Disk Cleanup.


    Pro Tips for Maximizing Task Scheduler

    To ensure your automated maintenance runs smoothly, keep these tips in mind:

    1. Set the Correct Security Options: When creating a task, in the “General” tab, make sure to select “Run whether user is logged on or not” and check “Run with highest privileges.” This ensures the task has the authority it needs to run.
    2. Configure Conditions Wisely: In the “Conditions” tab, you can set rules like “Start the task only if the computer is idle for” 10 minutes, or “Wake the computer to run this task.” This gives you fine-grained control.
    3. Don’t Forget the History: The “History” tab is your best friend for troubleshooting. If a task doesn’t run, check here for error messages.

    Conclusion: Reclaim Your Time with Automation

    Task Scheduler is a classic example of a powerful tool hiding in plain sight. By taking an hour to learn how to use Task Scheduler for routine maintenance, you invest in long-term PC health and personal productivity. You move from reacting to problems—like a full hard drive or missing backups—to preventing them entirely.

    routine maintenance
  • How to Batch Rename Files in Windows Without Extra Software

    How to Batch Rename Files in Windows Without Extra Software

    Are you tired of manually renaming dozens, or even hundreds, of files one by one? Perhaps you have a folder of vacation photos with confusing names like IMG_001.jpgIMG_002.jpg, or a collection of documents that desperately need a consistent naming convention. Manually correcting this is a tedious and time-consuming task. Fortunately, you don’t need to download any third-party utilities to solve this problem. Windows has powerful built-in tools that let you batch rename files quickly and efficiently.

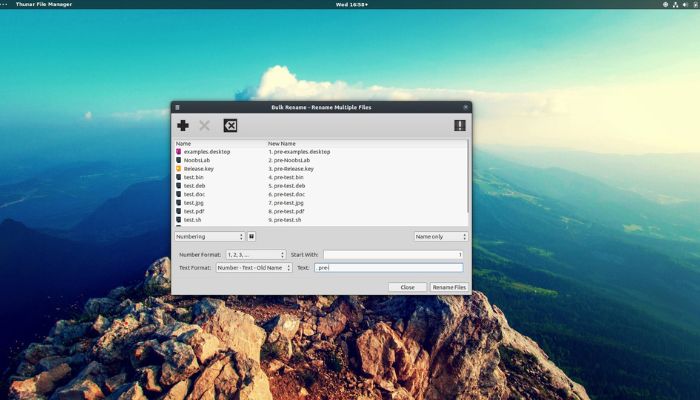
    This comprehensive guide will walk you through three native Windows methods to batch rename files in bulk. Whether you’re a casual user who prefers a point-and-click interface or a power user comfortable with command lines, we have a solution for you. By the end of this article, you’ll be able to organize your digital files with confidence, all without installing a single piece of extra software.

    Why You Should Master Batch Renaming in Windows

    Knowing how to batch rename files is more than just a neat trick; it’s a core digital organization skill. A well-named set of files is easier to search, sort, and manage. Consistent file names improve professionalism when sharing projects with colleagues or clients and are essential for managing large libraries of photos, music, or documents. The ability to batch rename files directly in Windows saves you from the hassle and potential security risks of downloading unknown software from the internet. The native tools are powerful, safe, and ready to use.

    Method 1: The Easiest Way – Using Windows File Explorer

    For most users, the Windows File Explorer method is the quickest and most straightforward way to batch rename files. It’s a graphical, intuitive process that requires no technical knowledge.

    Step-by-Step Guide to Batch Renaming in File Explorer

    1. Open and Select: Navigate to the folder containing the files you want to rename. Select all the files you wish to include. You can click and drag your mouse, or use the keyboard shortcut Ctrl + A to select all files in the folder. To select specific files, hold down the Ctrl key and click on each one.
    2. Initiate the Batch Rename: With the files selected, you can either:
      • Right-click on the first selected file and choose “Rename.”
      • Simply press the F2 key on your keyboard.
      • Click the “Rename” button in the Home tab of the File Explorer ribbon.
    3. Enter the New Name: Type the new base name for your files. For example, you might type Summer_Vacation_2024.
    4. Execute and Review: Press the Enter key. Windows will automatically rename all selected files, appending a sequential number in parentheses to the end of each file. Your files will now be named:
      • Summer_Vacation_2024 (1).jpg
      • Summer_Vacation_2024 (2).jpg
      • Summer_Vacation_2024 (3).jpg

    This method is perfect for quickly organizing a set of files with a common, descriptive name. The entire process to batch rename files this way takes only seconds.

    Method 2: The Powerful Way – Using Windows PowerShell

    For those who need more control and advanced options, Windows PowerShell is the ultimate tool to batch rename files. It allows you to use complex rules, change file extensions, and even remove specific characters based on patterns.

    Basic Bulk Rename with PowerShell

    Batch Rename Files

    Let’s start with a simple example that mirrors the File Explorer method but with more precision.

    1. Open PowerShell in the Target Folder: Navigate to your folder in File Explorer. Click on the address bar, type powershell, and press Enter. This opens a PowerShell window with the path already set to your current folder.
    2. Run a Simple Rename Command: Let’s say you want to add a prefix to all .txt files. The command would be:powershellGet-ChildItem *.txt | Rename-Item -NewName {“Project_Log_” + $_.Name}This command finds all files with the .txt extension and renames them, adding “Project_Log_” to the beginning of each original filename.

    Advanced PowerShell Techniques for Batch Renaming

    The real power of PowerShell lies in its ability to use conditional logic and regular expressions (regex). Here are some practical examples.

    Example 1: Replacing Spaces with Underscores

    To clean up filenames by replacing all spaces with underscores, you can use the -replace operator.

    powershell

    Get-ChildItem *.* | Rename-Item -NewName { $_.Name -replace " ", "_" }

    Example 2: Removing a Specific Phrase

    If you have files with an unwanted phrase, like “DRAFT,” you can remove it entirely.

    powershell

    Get-ChildItem *.* | Rename-Item -NewName { $_.Name -replace "DRAFT", "" }

    Example 3: Sequential Numbering with Leading Zeros

    For professional sequencing (e.g., for photos or chapters), you can add sequential numbers with a fixed number of digits.

    powershell

    Get-ChildItem *.jpg | Sort-Object Name | ForEach-Object -Begin { $count=1 } -Process { Rename-Item $_.FullName -NewName ("Conference_Photo_{0:D3}.jpg" -f $count++) }

    This command will rename .jpg files to Conference_Photo_001.jpgConference_Photo_002.jpg, etc.

    Pro Tip: Always use the -WhatIf parameter with the Rename-Item command before executing. This will show you a preview of the changes without actually renaming anything, preventing potential mistakes.
    Example: Get-ChildItem *.txt | Rename-Item -NewName {"New_" + $_.Name} -WhatIf

    Method 3: The Classic Way – Using Command Prompt (CMD)

    While PowerShell is more modern and powerful, the classic Command Prompt still has a reliable command to batch rename files: the ren (or rename) command. It’s useful for simple, wildcard-based renaming tasks.

    How to Use the ren Command for Batch Renaming

    Batch Rename Files
    1. Open Command Prompt in the Folder: Like with PowerShell, navigate to your folder in File Explorer, click on the address bar, type cmd, and press Enter.
    2. Understand the ren Syntax: The basic syntax is ren "original_pattern" "new_pattern". Wildcards (*) are used to match multiple files.
    3. Execute Common Rename Tasks:
      • To change a file extension for all files in a folder:cmdren *.txt *.docThis changes the extension of every .txt file to .doc.
      • To add a prefix to all .png files:cmdren *.png “backup_*.png”This renames image.png to backup_image.png.
      • To replace part of a filename: Let’s replace “old” with “new” in all files that contain that word.cmdren *old* *new*This would rename my_old_file.txt to my_new_file.txt.

    The Command Prompt is less intuitive than the other methods, but it’s incredibly fast for these specific, pattern-driven tasks.

    Read more about Never Lose Data Again: Your Guide to Automated Backups Windows

    Pro Tips and Best Practices for Batch Renaming

    Before you start your bulk renaming spree, keep these best practices in mind to avoid common pitfalls.

    • Always Create a Backup: Before using PowerShell or Command Prompt on a large set of important files, copy the files to a temporary folder. This gives you a safety net in case the rename operation doesn’t go as planned.
    • Preview Your Changes: As mentioned, use the -WhatIf parameter in PowerShell to see what will happen before you commit.
    • Mind the File Extensions: Be very careful not to alter the file extension (the part after the last dot, like .jpg.docx). Changing this can make the file unopenable by its default program. In File Explorer, ensure “File name extensions” is checked under the View tab so you can see them.
    • Use Descriptive Names: A good file name tells you what the file contains. Use dates (in a YYYY-MM-DD format for easy sorting), project names, and version numbers where appropriate.

    Troubleshooting Common Batch Rename Issues

    • “A duplicate file name exists” Error: This happens if your rename operation would result in two files having the same name. The sequential numbering in File Explorer prevents this, but in PowerShell/CMD, you need to ensure your new naming pattern is unique for each file.
    • “The system cannot find the file specified” Error in CMD/PowerShell: This usually means there’s a typo in your file path or the wildcard pattern isn’t matching any files. Double-check your command and the contents of the directory.

    Conclusion: Master Your File System with Native Tools

    As we’ve demonstrated, you possess all the tools you need to batch rename files effectively, built directly into your Windows operating system. From the simplicity of File Explorer to the raw power of PowerShell, you can choose the method that best fits your comfort level and the task’s complexity.

    Embrace these techniques to transform your disorganized folders into models of clarity and efficiency. Stop wasting time on manual renaming and start leveraging the powerful, native capabilities of Windows to keep your digital world perfectly organized.

  • Automate Daily Tasks and Reclaim Your Time: A PowerShell Guide

    Automate Daily Tasks and Reclaim Your Time: A PowerShell Guide

    Do you ever feel like your workday is consumed by small, repetitive computer tasks? Manually organizing download folders, copying files for backups, or generating the same daily report can eat up hours each week. This repetitive work is not just tedious; it steals time from more meaningful and productive activities. What if you could delegate these chores to your computer, perfectly executed every time, without you lifting a finger after the initial setup? The solution is to Automate Daily Tasks using the powerful tools already built into your PC.

    The good news is that you can, and you don’t need to be a programming expert to start. The key lies in PowerShell, a powerful scripting tool built right into Windows. This guide will demystify PowerShell and show you exactly how to automate daily tasks, transforming you from a manual operator into an efficient automation engineer. We will walk through practical, ready-to-use scripts that you can adapt to save precious time starting today.

    Why You Should Automate Daily Tasks with PowerShell

    Before diving into the code, it’s essential to understand the profound impact automation can have. PowerShell is more than just a command line; it’s a task automation framework. When you automate daily tasks, you achieve more than just speed.

    • Eliminate Human Error: A script performs the same steps perfectly every single time. No more accidental deletions, missed files, or typos in file names.
    • Boost Productivity and Focus: By offloading repetitive work, you free up mental energy and clock hours for creative problem-solving, strategic thinking, or other high-value work.
    • Ensure Consistency: Automated processes run on a schedule, ensuring critical tasks like backups or cleanups never get forgotten, even when you’re busy or away.
    • Empower Your Workflow: Learning to automate daily tasks gives you a deeper understanding of your computer and allows you to build custom solutions that off-the-shelf software can’t provide.

    Getting Started: Your First Steps in PowerShell

    To begin your journey to automate daily tasks, you need to meet PowerShell. The simplest way is to press Windows + R, type powershell, and press Enter. For the scripts we’ll be creating, it’s best to run them in the PowerShell Integrated Scripting Environment (ISE), which offers a better editing experience. Search for “Windows PowerShell ISE” in your Start Menu and run it as an administrator for full flexibility.

    A core concept in PowerShell is the cmdlet (pronounced “command-let”). These are simple, single-function commands that follow a “Verb-Noun” structure, like Get-Service or Copy-Item. The logic to automate daily tasks comes from combining these cmdlets into scripts—text files saved with a .ps1 extension.

    Read more about How to Monitor CPU and Memory Usage in Real Time

    H3: Your First Script: Automate File Organization

    Automate Daily Tasks

    Let’s start with a common headache: a cluttered Downloads folder. Manually sorting files by type is a perfect candidate for automation. The following script will automatically create folders and move files based on their extensions.

    The Script:

    powershell

    # Define the path to the folder you want to organize (e.g., your Downloads)
    $targetFolder = "C:\Users\YourName\Downloads"
    
    # Navigate to that folder
    Set-Location -Path $targetFolder
    
    # Get all the files in the folder
    $files = Get-ChildItem -File
    
    # Loop through each file
    foreach ($file in $files) {
        # Get the file extension without the dot
        $fileType = $file.Extension.TrimStart('.').ToLower()
    
        # Skip files without an extension
        if (-not $fileType) { continue }
    
        # Define the destination folder path for this file type
        $destinationFolder = Join-Path -Path $targetFolder -ChildPath $fileType
    
        # Create the destination folder if it doesn't already exist
        if (-not (Test-Path -Path $destinationFolder)) {
            New-Item -Path $destinationFolder -ItemType Directory
        }
    
        # Move the file into the destination folder
        Move-Item -Path $file.FullName -Destination $destinationFolder
    }
    
    Write-Host "File organization complete!" -ForegroundColor Green

    How to Use It:

    1. Open Notepad or the PowerShell ISE.
    2. Copy and paste the script above.
    3. Change the $targetFolder path to match your Downloads folder path.
    4. Save the file as Organize-Downloads.ps1 on your desktop.
    5. In PowerShell, navigate to your desktop and run it by typing: .\Organize-Downloads.ps1

    You’ve just used a script to automate daily tasks that would have taken you several minutes manually!

    Advanced Automation: Scheduling Your Scripts to Run Automatically

    The previous script is powerful, but you still have to run it. True automation means your computer does the work for you, even while you sleep. This is where the Windows Task Scheduler comes in.

    Let’s say you want to run the file organization script every Friday at 5 PM.

    Step-by-Step Guide:

    1. Open the Task Scheduler (search for it in the Start Menu).
    2. Click “Create Basic Task…” on the right-hand panel.
    3. Give it a name like “Weekly Downloads Cleanup” and a description.
    4. For the Trigger, select “Weekly” and set it for Fridays at 5:00 PM.
    5. For the Action, select “Start a program.”
    6. In the “Program/script” field, enter powershell.exe.
    7. In the “Add arguments” field, enter -ExecutionPolicy Bypass -File "C:\Users\YourName\Desktop\Organize-Downloads.ps1" (ensure the path points to your script).
    8. Complete the wizard.

    H3: Automate Daily Tasks for System Health and Backups

    Automate Daily Tasks

    Beyond organization, you can use PowerShell to protect your data and monitor your system.

    Script Example 1: Automated File Backup
    This script copies all new or modified files from your important “Documents” folder to a backup drive.

    powershell

    # Define source and backup locations
    $sourceFolder = "C:\Users\YourName\ImportantProjects"
    $backupDestination = "D:\MyBackups\"
    
    # The Robocopy command is a robust file-copying tool
    # /E copies subdirectories, /MIR mirrors the source (deletes files in destination that no longer exist in source)
    # /Z allows restartable mode for large files
    robocopy $sourceFolder $backupDestination /MIR /Z
    
    Write-Host "Backup operation finished." -ForegroundColor Green

    Script Example 2: Simple Disk Space Alert
    This script checks your C: drive and sends a pop-up alert if free space falls below a critical threshold.

    powershell

    # Set threshold to 10% free space
    $threshold = 10
    $disk = Get-WmiObject -Class Win32_LogicalDisk -Filter "DeviceID='C:'"
    $freeSpacePercent = ($disk.FreeSpace / $disk.Size) * 100
    
    if ($freeSpacePercent -lt $threshold) {
        # This will create a pop-up message box
        Add-Type -AssemblyName PresentationFramework
        [System.Windows.MessageBox]::Show("Warning: C: drive free space is below $threshold%!", "Disk Space Alert")
    }

    You can schedule both of these scripts with Task Scheduler to proactively automate daily tasks related to system maintenance.

    Best Practices and Security for PowerShell Automation

    As you begin to automate daily tasks, follow these guidelines for success and safety:

    • Test Thoroughly: Always test a new script on sample files or in a test folder before letting it loose on your important data.
    • Read the Script: Try to understand what each line of a script does before running it. This is the best defense against malicious code.
    • Execution Policy: By default, PowerShell restricts script execution for security. You may need to run Set-ExecutionPolicy RemoteSigned in an Administrator PowerShell window to allow your own scripts to run.
    • Start Small: Begin with simple, non-destructive tasks like the file organizer. Success with small scripts will build your confidence to tackle more complex automation.

    Conclusion: Your Time is Your Most Valuable Asset

    The ability to automate daily tasks is a superpower in the modern digital world. PowerShell is the key that unlocks this capability on your Windows PC. You’ve seen how a few lines of code can organize files, protect data with backups, and monitor system health—all without manual intervention.

    Start today. Pick one repetitive task that annoys you, use the examples in this guide to build a simple script, and experience the satisfaction of seeing it run automatically. The initial investment of time to learn and set up these scripts pays for itself many times over, giving you back control of your most valuable asset: your time.

    Automate Daily Tasks

  • Automate Disk Cleanup: A PowerShell Guide for IT Pros

    Automate Disk Cleanup: A PowerShell Guide for IT Pros

    Manual disk cleanup is a tedious, repetitive task that plagues IT departments and power users. Clicking through graphical interfaces to delete temporary files and clear caches is an inefficient use of valuable time. What if you could schedule this process to run silently in the background, ensuring optimal system performance and free space without any manual intervention? The key lies in harnessing the power of Windows PowerShell. This guide will teach you how to automate disk cleanup using robust, scriptable solutions that go far beyond the standard GUI tools, providing a set-it-and-forget-it approach to system hygiene.

    Why You Must Automate Disk Cleanup

    The benefits of moving from a manual to an automated process are substantial, especially in environments with multiple systems.

    • Enhanced Efficiency: Eliminate hours of repetitive work. A script executes complex cleanup routines in seconds.
    • Unmatched Consistency: Scheduled tasks ensure cleanup happens regularly and thoroughly, according to a predefined standard, reducing human error.
    • Proactive Maintenance: Prevent disk space from becoming a critical issue. Automated scripts can run during off-hours, maintaining system health without disrupting productivity.
    • Scalable Management: Deploy the same proven script across an entire fleet of workstations or servers, guaranteeing uniform maintenance.

    Foundational PowerShell Cleanup Scripts

    Before building a complex scheduler, you must master the core commands that form the backbone of any effort to automate disk cleanup.

    Clear Temporary Files with Precision

    The most immediate gain in disk space comes from removing user and system temporary files. This script targets these locations with surgical precision.

    powershell

    # Script to remove user and system temporary files
    Write-Host "Initiating Temporary Files Cleanup..." -ForegroundColor Green
    
    # Remove current user's temp files
    Remove-Item -Path "$env:TEMP\*" -Recurse -Force -ErrorAction SilentlyContinue
    
    # Remove system-wide temp files (requires elevation)
    Remove-Item -Path "C:\Windows\Temp\*" -Recurse -Force -ErrorAction SilentlyContinue
    
    # Clean the .NET NuGet cache (a common space hog)
    dotnet nuget locals all --clear
    
    Write-Host "Temporary files cleanup completed successfully." -ForegroundColor Green

    Key Parameters Explained:

    • -Recurse: Deletes items from all child directories.
    • -Force: Overrides read-only attributes and file locks where possible.
    • -ErrorAction SilentlyContinue: Suppresses error messages for files that are in use, allowing the script to continue running smoothly.

    Leverage the Classic Cleanmgr with PowerShell

    Automate Disk Cleanup

    While the graphical Disk Cleanup tool (cleanmgr.exe) is well-known, you can automate disk cleanup with it using its command-line parameters via PowerShell. This is ideal for accessing system-level cleanup options like Windows Update cleanup.

    powershell

    # Use Disk Cleanup utility silently with all parameters
    Write-Host "Starting System Disk Cleanup..." -ForegroundColor Green
    
    # The /sagerun:65535 flag runs with all possible cleanup options enabled
    Start-Process -FilePath "cleanmgr.exe" -ArgumentList "/sagerun:65535" -Wait -NoNewWindow
    
    Write-Host "System Disk Cleanup finished." -ForegroundColor Green

    Pro Tip: First, you need to initialize the profile. Run cleanmgr /sageset:65535 once manually, check all the boxes you want to clean, and click OK. This saves your settings. The script above will then use that saved profile to run completely unattended.

    Advanced Automation Strategies

    For a truly enterprise-grade solution, you need to combine these scripts with powerful scheduling and logging.

    Read more about How to Free Up Disk Space Using Built-in Windows Tools You Didn’t Know About

    Build a Comprehensive Cleanup Script

    This master script combines multiple techniques and adds robust logging, a critical feature for auditing and troubleshooting.

    powershell

    # Master Automated Disk Cleanup Script with Logging
    function Write-CleanupLog {
        param([string]$Message)
        $Timestamp = Get-Date -Format "yyyy-MM-dd HH:mm:ss"
        $LogEntry = "[$Timestamp] $Message"
        Write-Host $LogEntry
        $LogEntry | Out-File -FilePath "C:\Logs\DiskCleanup.log" -Append
    }
    
    Write-CleanupLog "=== Disk Cleanup Session Started ==="
    
    try {
        # 1. Clean Temp Directories
        Write-CleanupLog "Cleaning temporary directories..."
        Remove-Item -Path "$env:TEMP\*", "C:\Windows\Temp\*" -Recurse -Force -ErrorAction SilentlyContinue
    
        # 2. Empty Recycle Bin (for all drives)
        Write-CleanupLog "Emptying Recycle Bin..."
        Clear-RecycleBin -DriveLetter C -Force -ErrorAction SilentlyContinue
    
        # 3. Clear Windows Update Cache (Caution: will force update re-download)
        Write-CleanupLog "Stopping BITS and Windows Update services..."
        Stop-Service -Name BITS, wuauserv -Force -ErrorAction SilentlyContinue
        Remove-Item -Path "C:\Windows\SoftwareDistribution\Download\*" -Recurse -Force -ErrorAction SilentlyContinue
        Start-Service -Name BITS, wuauserv -ErrorAction SilentlyContinue
    
        # 4. Run Disk Cleanup Utility
        Write-CleanupLog "Running System Disk Cleanup..."
        Start-Process -FilePath "cleanmgr.exe" -ArgumentList "/sagerun:65535" -Wait -NoNewWindow
    
        Write-CleanupLog "=== Disk Cleanup Session Completed Successfully ==="
    }
    catch {
        Write-CleanupLog "ERROR: An error occurred during cleanup - $($_.Exception.Message)"
    }

    Schedule Your Automated Cleanup

    Automate Disk Cleanup

    The final step to fully automate disk cleanup is to create a scheduled task that runs your script periodically. This can be done directly from PowerShell.

    powershell

    # Create a scheduled task to run the cleanup every Sunday at 3:00 AM
    $Action = New-ScheduledTaskAction -Execute "PowerShell.exe" -Argument "-WindowStyle Hidden -File `"C:\Scripts\MasterCleanup.ps1`""
    $Trigger = New-ScheduledTaskTrigger -Weekly -DaysOfWeek Sunday -At 3am
    $Settings = New-ScheduledTaskSettingsSet -AllowStartIfOnBatteries -DontStopIfGoingOnBatteries -StartWhenAvailable
    $Principal = New-ScheduledTaskPrincipal -UserId "SYSTEM" -LogonType ServiceAccount -RunLevel Highest
    
    Register-ScheduledTask -TaskName "AutomatedDiskCleanup" -Action $Action -Trigger $Trigger -Settings $Settings -Principal $Principal -Description "Automated weekly disk cleanup task."
    
    Write-Host "Scheduled task 'AutomatedDiskCleanup' created successfully." -ForegroundColor Green

    This task runs with SYSTEM privileges, ensuring it has the necessary permissions to clean system files, and will execute even if no user is logged in.

    Troubleshooting Common Script Issues

    When you automate disk cleanup, you may encounter hurdles. Here’s how to overcome them.

    • “Access Denied” Errors: Always run your PowerShell session as Administrator. The scheduled task is configured to use the SYSTEM account for maximum permission.
    • Files “In Use”: The -ErrorAction SilentlyContinue parameter is crucial here. It allows the script to skip locked files and continue, rather than halting entirely.
    • Logging Failures: Ensure the directory for your log file (e.g., C:\Logs) exists before running the script. You can add a line to your script like New-Item -ItemType Directory -Force -Path "C:\Logs" to create it automatically.

    Conclusion: Embrace a Hands-Off Maintenance Model

    Learning to automate disk cleanup with PowerShell is a transformative skill for any IT professional. It shifts system maintenance from a reactive chore to a proactive, streamlined process. By implementing the scripts and strategies outlined above—from basic temporary file deletion to a fully-scheduled, logged, and comprehensive cleanup task—you can ensure your systems remain lean, performant, and reliable. Stop wasting time with manual cleanups and start deploying the powerful, automated solutions built directly into your Windows environment.