Tag: DevOps

  • Serverless Architectures Explained (With Examples) You Didn’t Know About

    Serverless Architectures Explained (With Examples) You Didn’t Know About

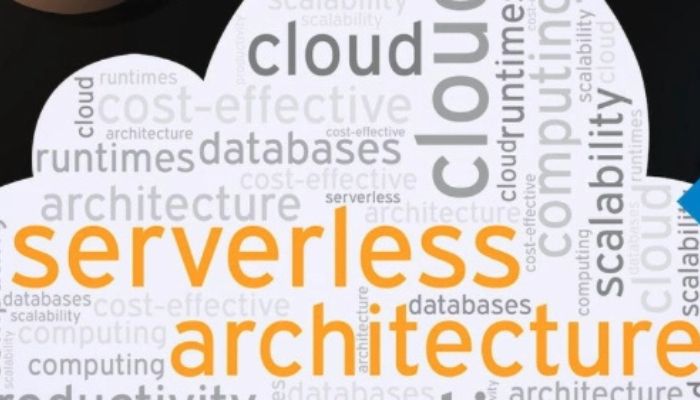
    When you hear the term “serverless architectures,” you might think it means applications running without servers. In reality, serverless architectures are a cloud computing execution model where the cloud provider dynamically manages the allocation and provisioning of servers. The core principle is simple: developers focus solely on writing code for individual functions, while the cloud platform handles all the underlying infrastructure. This shift represents a fundamental change in how we build and deploy modern applications, offering unprecedented scalability and cost-efficiency.

    What Are Serverless Architectures, Really?

    At its heart, serverless computing is about abstraction. Traditional cloud models require you to manage virtual machines, containers, or operating systems—you’re always aware of the server. With a serverless approach, that responsibility vanishes. You upload your code, and the cloud provider executes it on your behalf, scaling it up or down perfectly with demand. The term “Function as a Service” (FaaS) is often used interchangeably, with AWS Lambda, Azure Functions, and Google Cloud Functions being the most prominent platforms.

    The true genius of serverless architectures lies in their event-driven nature. Your code isn’t running 24/7; it lies dormant until a specific trigger wakes it up. This trigger could be an HTTP request, a new file uploaded to cloud storage, a scheduled time, or a message arriving in a queue.

    Core Benefits of Adopting Serverless Architectures
    serverless architectures

    The move to a serverless model isn’t just a technical curiosity; it delivers tangible business and operational advantages that are redefining development workflows.

    Unmatched Cost Efficiency

    Unlike traditional servers that you pay for continuously, serverless computing follows a true pay-per-use model. You are billed only for the milliseconds your code is executing and the number of times it runs. When your function finishes its task, the billing stops. This can lead to massive cost savings, especially for applications with sporadic or unpredictable traffic.

    Built-in, Effortless Scalability

    This is a cornerstone benefit of serverless architectures. The cloud provider automatically scales your application from zero to thousands of concurrent executions and back down to zero seamlessly. There is no need to pre-provision capacity or worry about traffic spikes overwhelming your infrastructure. The scaling is granular and instantaneous.

    Enhanced Developer Productivity

    By eliminating server management, patching, and capacity planning, developers can focus entirely on writing business logic. This accelerates development cycles and allows small teams to build and maintain powerful applications. Serverless architectures encourage a microservices-style approach, leading to more modular and maintainable codebases.

    Advanced Serverless Architecture Patterns with Examples

    While image resizing and simple APIs are common examples, let’s explore some more sophisticated and lesser-known applications of serverless computing.

    Real-Time Data Enrichment Pipelines

    Imagine you have a stream of user activity data from a mobile app. Each event is minimal—just a user ID and an action. A serverless architecture can enrich this data in real-time before storing it.

    Example: An e-commerce site triggers a function every time a user clicks “add to cart.” The function:

    1. Receives the click event with a user_id and product_id.
    2. Queries a database to fetch the user’s profile (e.g., loyalty tier, location).
    3. Queries the product catalog to get product details (e.g., category, price).
    4. Combines all this information into a single, enriched data object.
    5. Streams the enriched object to a data warehouse like Amazon Redshift or Google BigQuery for analytics.

    This pattern transforms raw, low-value data into rich, immediately analyzable information without managing any stream-processing clusters.

    Dynamic Security Automation and Bot Mitigation

    serverless architectures

    Serverless architectures are perfect for implementing security measures that are both highly responsive and cost-effective.

    Example: A CloudFront distribution (CDN) can trigger a Lambda function every time a request returns a 404 (Not Found) status code. The function can then:

    1. Analyze the request: Is it for a common WordPress admin path that doesn’t exist on your site?
    2. Check the IP address against a threat intelligence feed.
    3. If the request is deemed malicious, the function can automatically update a Web Application Firewall (WAF) rule to block the offending IP address for a period of time.

    This creates a self-healing, adaptive security layer that proactively defends your application.

    Choreographed Microservices Workflows

    For complex business processes, you can use a serverless workflow engine (like AWS Step Functions or Azure Durable Functions) to orchestrate multiple serverless functions.

    Example: An Order Fulfillment System

    1. A function is triggered when a new order is placed in a database.
    2. A workflow engine takes over and executes a series of steps:
      • Process Payment: Calls a function to charge the customer’s card.
      • Reserve Inventory: If payment succeeds, calls a function to reserve the item in the warehouse system.
      • Send Notifications: In parallel, it triggers functions to send a “Order Confirmed” email and an internal Slack message to the shipping team.
      • Handle Failures: If any step fails (e.g., payment declines), the workflow automatically triggers a compensating function to release inventory and send a “Payment Failed” email.

    This pattern provides incredible visibility into complex processes and makes them resilient to failure, all without a single long-running server.

    Navigating the Challenges of Serverless Computing

    No architecture is a silver bullet. It’s crucial to understand the trade-offs involved with serverless architectures.

    • Cold Starts: A brief latency when a function is invoked after being idle, as the platform initializes a runtime environment.
    • Vendor Lock-in: Your business logic becomes tightly coupled with the provider’s specific FaaS API and event formats.
    • Debugging and Monitoring: Traditional debugging tools are less effective, requiring a shift towards distributed tracing and specialized monitoring services.
    • Complexity in State Management: By design, functions are stateless. Managing user sessions or application state requires external services like databases or Redis.

    Conclusion: Embracing the Serverless Mindset

    serverless architectures

    Serverless architectures are more than just a technology; they represent a paradigm shift toward building efficient, resilient, and highly scalable applications. The examples discussed—from real-time data enrichment to choreographed workflows—demonstrate that serverless is moving far beyond simple webhooks.

    While challenges exist, the benefits of reduced operational overhead, granular scaling, and cost optimization are too significant to ignore. The future of cloud development is increasingly event-driven and serverless. By starting with a single function to handle a specific task, you can begin to leverage the power of serverless computing and architect your applications for the modern world.

    Read more about The Future of Frontend Frameworks: React vs Svelte vs Solid You Didn’t Know About

  • Master Git & GitHub: Beyond add, commit, push

    Master Git & GitHub: Beyond add, commit, push

    You’ve likely run the classic trio of Git commands: git addgit commit, and git push. You might even be comfortable creating pull requests on GitHub. But do you ever feel like you’re just skimming the surface of what’s possible? To truly Master Git & GitHub, you need to move beyond basic commands and understand the powerful workflows that enable efficient version control and seamless collaboration. This guide is designed to take you from a functional user to a proficient practitioner, unlocking the advanced techniques that will help you master version control and become a more effective collaborator. Let’s begin your journey to mastering Git & GitHub and transform how you work with code.

    This guide is designed to take you from a functional user to a proficient practitioner. We’re moving beyond the simple scripts to explore the practical techniques and lesser-known features that will help you truly master Git and GitHub. We’ll cover the mindset, the advanced commands, and the collaborative workflows that separate beginners from experts.

    The Foundation: What It Truly Means to Master Git

    Before diving into advanced commands, let’s reframe our understanding. Mastering Git is about using version control as a strategic tool for project management, not just a backup system. It’s the difference between having a messy stack of saved files and maintaining a clean, navigable history of your project’s evolution.

    A key part of this foundation is understanding the three main states your code can be in:

    1. Working Directory: Where you make your changes.
    2. Staging Area (Index): Where you carefully prepare which changes will be part of your next snapshot.
    3. Repository: The database where your committed snapshots are permanently stored.

    Understanding this flow is the first step to moving from a basic user to someone who can master Git workflows effectively.

    H2: Master Git & GitHub: Essential Core Concepts for Version Control Mastery

    The real power of Git lies in its ability to help you manage your local history before you even think about sharing with others.

    H3: Master Git & GitHub: Rewriting Commit History with Amend and Rebase

    A clean commit history is a form of documentation. Here’s how to achieve it.

    • git commit --amend: Made a typo in your last commit message? Forgot to stage a file? Instead of creating a new, tiny commit, you can amend the previous one. This is your first tool for keeping history tidy.bashgit commit -m “Initial commit” # Oops, forgot a file! git add forgotten-file.js git commit –amend # This opens your editor to let you update the commit message if needed.
    • git rebase -i (Interactive Rebase): This is a game-changer for anyone looking to master Git history. It allows you to squash multiple commits into one, reorder commits, edit commit messages, or even drop commits entirely. Crucial Note: Only use this on commits that you haven’t already pushed to a shared branch, as it rewrites history.bash# Rebase the last 3 commits git rebase -i HEAD~3

    H3: Master Git Workflows: Advanced Stashing and Selective Committing

    "Master Git & GitHub"

    Mastering Git means controlling precisely what gets committed and when.

    • git stash for Context Switching: Need to quickly switch branches to fix a bug, but you’re in the middle of unfinished work? git stash temporarily shelves your changes, giving you a clean working directory. git stash pop brings them back.bashgit stash push -m “WIP on user auth feature” # Switch branches, do your work, then return and… git stash pop
    • git add -p (Patch Mode): This is one of the most underused commands for those aiming to master Git. It allows you to interactively stage specific parts of a file, not the entire file. This lets you create logical, focused commits even when you’ve fixed multiple issues in the same file.bashgit add -p # Git will show you each “hunk” of change and ask: (y)es, (n)o, (s)plit, (e)dit, (q)uit?

    H2: Master Git & GitHub: Essential Core Concepts for Version Control Mastery

    Git manages history; GitHub facilitates collaboration. Mastering GitHub is about using its suite of tools to streamline teamwork and code quality.

    Read more about Beyond The Basics: Deploying Your Web App on Vercel and Netlify in 2025

    H3: Master Git & GitHub: Rewriting Commit History with Amend and Rebase

    A Pull Request (PR) is more than a request to merge code; it’s a platform for discussion and improvement.

    • Draft Pull Requests: Use Draft PRs to signal that your work is in progress. This lets team members review the direction of your code early without the pressure of it being ready for merge. It’s a cornerstone of asynchronous collaboration for those who master GitHub workflows.
    • Template-driven PRs: Enforce consistency by using PR templates (create a .github/PULL_REQUEST_TEMPLATE.md file in your repo). This ensures every PR includes context, testing steps, and a checklist, making reviews faster and more thorough.

    H3: Master Git & GitHub: Implementing Branch Protection Rules

    To master GitHub from an administrative perspective, you must use Branch Protection Rules. These are critical for any serious project.

    1. Go to your repo Settings > Branches > Branch protection rules.
    2. Add a rule for your main branch (e.g., main or master).
    3. Key settings to enable:
      • Require Pull Requests before merging: Ensures all code is reviewed.
      • Require approvals: Mandates at least one (or more) reviewer sign-off.
      • Require status checks to pass: Forces CI/CD pipelines (like GitHub Actions) to run successfully before a merge.
      • Include administrators: Applies the rules to everyone, ensuring a consistent process.

    H3: Master Git & GitHub: Using Reflog for Recovery and Safety

    Here are the “secret weapons” that truly signify you’ve learned to master Git & GitHub.

    • git reflog – Your Safety Net: Accidentally deleted a branch or rebased something into oblivion? The Reflog is a local log of every single action you’ve taken in your repository. It’s your history’s history. You can use it to find the hash of a “lost” commit and restore it.bashgit reflog # Find the commit hash before your mistake git checkout -b recovered-branch <commit-hash>
    • git bisect – The Bug Hunter: This command uses a binary search algorithm to help you pinpoint the exact commit that introduced a bug. You tell it a “good” commit (where the bug didn’t exist) and a “bad” commit (where it does), and it efficiently tests commits in between.bashgit bisect start git bisect bad HEAD git bisect good a1b2c3d4 # Git will automatically check out commits for you to test
    • git worktree – Multitasking Mastery: Need to work on two different branches simultaneously without constantly stashing and switching? git worktree allows you to have multiple working trees attached to the same repository. You can have your main branch open in one window and a feature branch in another, independently.

    Common Pitfalls and How to Avoid Them

    • Pitfall #1: Committing directly to the main branch. This bypasses code review and is a common source of bugs.
      • Solution: Adopt a branch-based workflow for every new feature or bug fix.
    • Pitfall #2: Writing vague commit messages. “Fixed stuff” is useless.
      • Solution: Use the conventional commits format or simply write a subject line in the imperative mood, under 50 characters, with a body explaining the why, not the what.
    • Pitfall #3: Fear of rebase and reset. This leads to a messy history.
      • Solution: Practice these commands in a temporary repository until you are comfortable. They are your best friends for maintaining clarity.

    Conclusion: Your Path to Mastery

    "Master Git & GitHub"

    To truly master Git and GitHub is to embrace a philosophy of clean, communicative, and collaborative development. It’s not about knowing every command, but about knowing the right tool for the job. Start by integrating one new technique from this guide into your workflow this week—perhaps interactive adding (git add -p) or starting to use Draft PRs. As these become second nature, incorporate another.

    The journey to master Git & GitHub is ongoing, but by moving beyond the basics, you are now equipped to work with greater efficiency, confidence, and control. Now, go forth and commit

  • Beyond The Basics: Deploying Your Web App on Vercel and Netlify in 2025

    Beyond The Basics: Deploying Your Web App on Vercel and Netlify in 2025

    If you’re a developer looking to deploy a web app on Vercel or Netlify, you already know these platforms are the gold-standard for launching modern web applications. They abstract away the complexities of servers, scaling, and content delivery networks (CDNs), letting you focus on what you do best: writing code. But the landscape is always evolving. The standard git push deployment is just the starting line.

    This guide will take you beyond the fundamentals. We’re diving into the advanced, lesser-known techniques and 2025-specific features for how to deploy a web app on Vercel and Netlify. You’ll discover how to leverage AI, optimize for Core Web Vitals like never before, and implement workflows that truly set your projects apart.

    Why Vercel and Netlify Are Still Dominating in 2025

    Before we get into the specific steps on how to deploy your web application, let’s quickly address the “why.” While competitors exist, both Vercel and Netlify have aggressively innovated to make their platforms the top choice for a modern web app deployment.

    • Vercel has doubled down on its frontend cloud vision. When you choose to deploy a web app on Vercel today, you’re leveraging a platform that has deeply integrated AI SDKs and made its Edge Network the default. This means your entire application logic runs globally by default from the moment you deploy.
    • Netlify has matured its composable web platform, a structure that directly benefits your deployment process. It offers unparalleled flexibility for connecting headless CMSs and e-commerce engines, making it incredibly efficient to deploy a complex web app that relies on multiple services.

    Understanding these core philosophies is key to choosing the right platform and unlocking its full potential when you deploy your web app.

    H2: Advanced Strategies to Deploy a Web App on Vercel

    Vercel, the creator of Next.js, is synonymous with the Jamstack. Here’s how to go beyond a simple Git integration in 2025 and master the deployment of your app on Vercel.

    H3: Leveraging the Vercel AI SDK & Runtime for Smart Apps

    The biggest shift in 2024/2025 has been the integration of AI. When you deploy a Next.js app to Vercel, you’re not just hosting static files. You’re deploying to a platform built for AI-first applications.

    • Seamless AI Runtime: The Vercel AI SDK is now optimized to run on Vercel’s serverless and edge functions with zero configuration. This means you can integrate chatbots, content generators, and complex AI features without worrying about the underlying infrastructure. Deploying these advanced features is as simple as pushing your code.
    • Pro Tip: Use the ai/rsc (React Server Components) package for Next.js. When you deploy this on Vercel, your AI streams are delivered from the edge, resulting in near-instantaneous response times for users globally.

    H3: Mastering Vercel’s 2025 Edge Config and Middleware

    Edge Config has evolved from a niche feature to a core part of the deployment strategy.

    • Dynamic Configuration at the Edge: Imagine being able to run A/B tests, toggle features, or update redirects without redeploying your entire application. With Edge Config, you can. This is a game-changer for marketing campaigns and rapid experimentation.
    • Intelligent Middleware: Use middleware.js in your project to not just handle redirects, but for true personalization. You can geo-target content, serve different experiences based on user cookies, and block bots—all before the request hits your application, saving compute resources and boosting speed.

    H2: Next-Level Techniques to Deploy a Web App on Netlify

    Deploy Web App Vercel Netlify

    Netlify’s strength lies in its robust ecosystem and developer experience. Their 2025 updates have made the platform more powerful and intuitive.

    H3: Netlify’s Composable Web and Distributed Persistent Rendering (DPR)

    While Vercel pushes the edge for compute, Netlify has refined its approach to content and build systems.

    • The Power of nfpr: Distributed Persistent Rendering is Netlify’s answer to slow, monolithic builds. For large sites, you can now deploy only the pages that have changed. By adding nfpr = true to your netlify.toml file, you trigger a build system that caches unchanged pages and builds only new or modified content. This can cut build times from 30 minutes to 30 seconds.
    • Seamless Composability: Use the Netlify Connect (formerly OneGraph) to unify your data sources. When you deploy your Netlify site, it can now pull data from your headless CMS, database, and even third-party APIs in a single, optimized request, drastically improving Time to First Byte (TTFB).

    H3: Advanced Image Optimization and Core Web Vitals Mastery

    Google’s performance metrics are non-negotiable, and Netlify has built-in tools to ace them.

    • Netlify Image CDN: Don’t just rely on a plugin. Netlify’s native Image CDN is now on par with dedicated services. It automatically handles formats like WebP and AVIF, responsive sizing, and lazy loading. The key is to use the netlify-image helper in your templates, which ensures every image is optimized at deploy time and served from a global CDN.
    • Real User Monitoring (RUM): Netlify Analytics now provides real Core Web Vitals data from your actual users, not synthetic testing. This data is invaluable for understanding the real-world performance impact of every deployment you make.

    The Ultimate Deployment Checklist for 2025

    No matter which platform you choose, follow this checklist to ensure a professional, optimized launch.

    1. Security First: Never commit environment variables to your repo. Use the platform’s dashboard to securely inject API_KEYs and DATABASE_URLs. In 2025, both platforms offer enhanced secret scanning and role-based access control.
    2. Domain & SSL: Connect your custom domain. Both Vercel and Netlify provide free, auto-renewing SSL certificates, but ensure you configure redirects from http to https and the non-www to www version (or vice versa) in your platform settings.
    3. Branch Previews: This is non-negotiable. Configure your project so that every Pull Request generates a unique, live preview URL. This is the cornerstone of modern CI/CD and is built into both Vercel and Netlify by default.
    4. Post-Deploy Hooks: Automate your workflow. Use webhooks to trigger Slack notifications, regenerate a sitemap, or run end-to-end tests after a successful deployment.

    Vercel vs. Netlify: Which Should You Choose for Your Next Deployment?

    Deploy Web App Vercel Netlify

    So, how do you decide?

    • Choose Vercel if: You are building a Next.js application, heavily investing in AI/LLM integrations, or require the most granular edge computing capabilities for dynamic content.
    • Choose Netlify if: You value a robust, plugin-rich ecosystem, are building a large, content-heavy site that benefits from DPR, or are deeply invested in a composable architecture with multiple headless services.

    The best news? You can’t make a bad choice. Both platforms offer stellar free tiers that are perfect for getting started, and both will provide a deployment experience light-years ahead of traditional hosting.

    Read more about How to Choose the Right Programming Language for Your Project: The Factors You Didn’t Know About

    Conclusion: Your Deployment Game, Leveled Up

    Deploying a web application in 2025 is about so much more than just making your site live. It’s about leveraging a global infrastructure, integrating intelligent features, and adopting a workflow that is both powerful and effortless. By moving beyond the basic git push and embracing the advanced features of Vercel and Netlify—from AI runtimes and Edge Config to Distributed Persistent Rendering and native image optimization—you ensure your web app is not just online, but is fast, secure, and primed for the future.

    Now, you have the knowledge. It’s time to deploy your web app on Vercel or Netlify like a true 2025 pro.